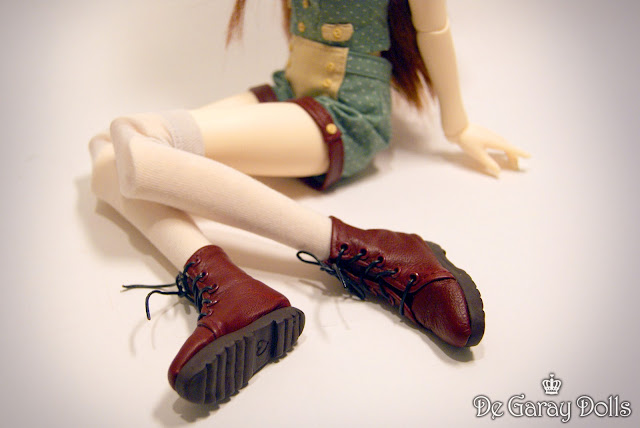
These boots are made for walking!
First I carefully drew around her feet in pencil on some thin card, adding a bit extra for the shape of the front of the boot. In the book it shows the feet removed, but I didn't do this (because I was feeling too lazy to!). Although it probably would have been slightly less fiddly if I had, it didn't really make too much of a difference. This is what it looked like:
Then I wrapped the feet in clingfilm to protect them, because the next part was to create a moulded toe-cap using a small quantity of air-dry clay.
 Being in the UK, it was not easy to get hold of and I couldn't find a UK-based supplier, so I ordered it from a great little shop in the Netherlands, called Heins-Hobbies (http://www.heins-hobbys.nl/ in Dutch, but scroll down to English part), who were very friendly, spoke excellent English, used Paypal for ordering and were all-round very reliable. Recommded to anyone for doll-making supplies!
I also cut out some soles for the boots from thick, black mount card, tracing around the paper templates (see above). The Yoshida book seems to use wood, but I couldn't figure out how I would get the curved arch into the sole without taking a thicker piece of wood and carving it, so I opted for thick card instead which I was able to bend easily. For this small scale this was fine, but it probably wouldn't be appropriate for larger scale dolls. I also cut out an extra couple of heel pieces to stack on top of each other.
I used La Doll Premix,which I'd heard a lot about as being a commonly used clay for BJD making. This is a premixed version of two types of air-dry clay which the La Doll company make: the normal La Doll and La Doll Premiere. It is supposed to dry to a hard, durable finish, so I've yet to use it properly for scuplting before I can give a full verdict. But so far, and is the first time I've used it, I found it I've been quite impressed by its lightness and hardness.
 Being in the UK, it was not easy to get hold of and I couldn't find a UK-based supplier, so I ordered it from a great little shop in the Netherlands, called Heins-Hobbies (http://www.heins-hobbys.nl/ in Dutch, but scroll down to English part), who were very friendly, spoke excellent English, used Paypal for ordering and were all-round very reliable. Recommded to anyone for doll-making supplies!
I sewed the two side panels together at the back, forming the heel and rear ankle part of the shoe.
 Then the leather sides can be placed on, putting a little bit of glue at the front where the sides join the toe part. As before, I carefully cut little darts into the overlap of the leather, where it is glued to the internal sole (thin card). This was to prevent big lumpy folds of leather from making a messy join between the leather and the sole.
Then the seams were sewn omitting the bottom part which was going to be glued to the sole.
The eyelets were punched into the curved front part. I marked with a pencil through the holes of the eyelets where the holes were to be punched on the other side, so that they would be equal.
Next I glued the pre-cut leather tongue to the underside of the toe part of leather. (Although I think in future what a better way would have been that rather than cutting out the tongue part separately and glueing it to the underside of the toe leather, I would cut the toe and tongue part out of one continuous piece of leather, so that there's no join.)
Then this is glued onto the clay toe cap (so that it wouldn't fall out when removing the shoe, because you want the cap to maintain the shoe shape).
I didn't sew a seam for the leather tongue because I didn't want it to be too bulky, but I think at larger scale I would. Being so small a neatly cut edge to the tongue seems to be sufficient. The leather side panels will overlap the toe part and be glued to it, so a seam wasn't needed for this either.
Then I carefully cut out small triangle 'darts' into the leather overlap which was going to be glued to the thin card sole. (Use very sharp scissors for this, otherwise it could end up being a bit messy!) The leather does have to be stretched and held into position while gluing so that you don't get visible folds at the join between the leather and the sole, when it gets glued on.
 Then the leather sides can be placed on, putting a little bit of glue at the front where the sides join the toe part. As before, I carefully cut little darts into the overlap of the leather, where it is glued to the internal sole (thin card). This was to prevent big lumpy folds of leather from making a messy join between the leather and the sole.
The fun part was lacing up the boot - lets you know you're almost done!
So then the sole is glued to the underside of the leather and internal sole. This has to be pressed very firmly to get a neat join, so there has to be enough glue to secure it, but not so much that it squishes out all over the place! If I were making boots for a larger scale and I wanted them to be more secure than using glue alone, I would probably try to sew the upper leathers to a thicker inner sole and then nail some tiny, short pins through the lower outer sole to this, a bit like how shoes were traditionally made. That is if I were using a wooden sole, or even cast rubber. And tiny, short pins can be acquired by simply clipping some dressmaker's pins down to size (the ones with the tiny heads of course, :p not the bobble head ones) But as I say, not tried this yet, so there may be better ways still, I'm learning as I go!
And here they are!
And here they are!
Next up: Getting closer and closer to completion, so she'll definitely be needing a hat! And where would a girl be without some accessories!


Wonderful little tutorial! I too have just bought Berry Hujoo and at the moment she is without shoes, faceup and proper wig so your tutorials will really help.
ReplyDeleteI'm also editor of a doll magazine and would like to contact you but can't see an email. If you can contact me on tiara.tiara@me.com I'd appreciate it.
Many thanks
Hay,
ReplyDeleteWauw...what a lovely boots!
I love your blog.
Please take a look into my world.
Groetjes..Marijke
www.marijkevanooijen.blogspot.com
What a great tutorial! Just stumbled upon your blog, I'm your newest follower! I just started making dolls these past few months. I finally finished one the other day. Shoes look pretty tricky but you made it look very doable!
ReplyDeleteHi Rinni, Emma and Marijke,
DeleteThanks for your messages, hope you enjoyed your visit and found it useful! I always love to meet other doll fans and doll makers, so feel free to come by anytime!